Your Cart is Empty


The DIYer’s Tool Kit
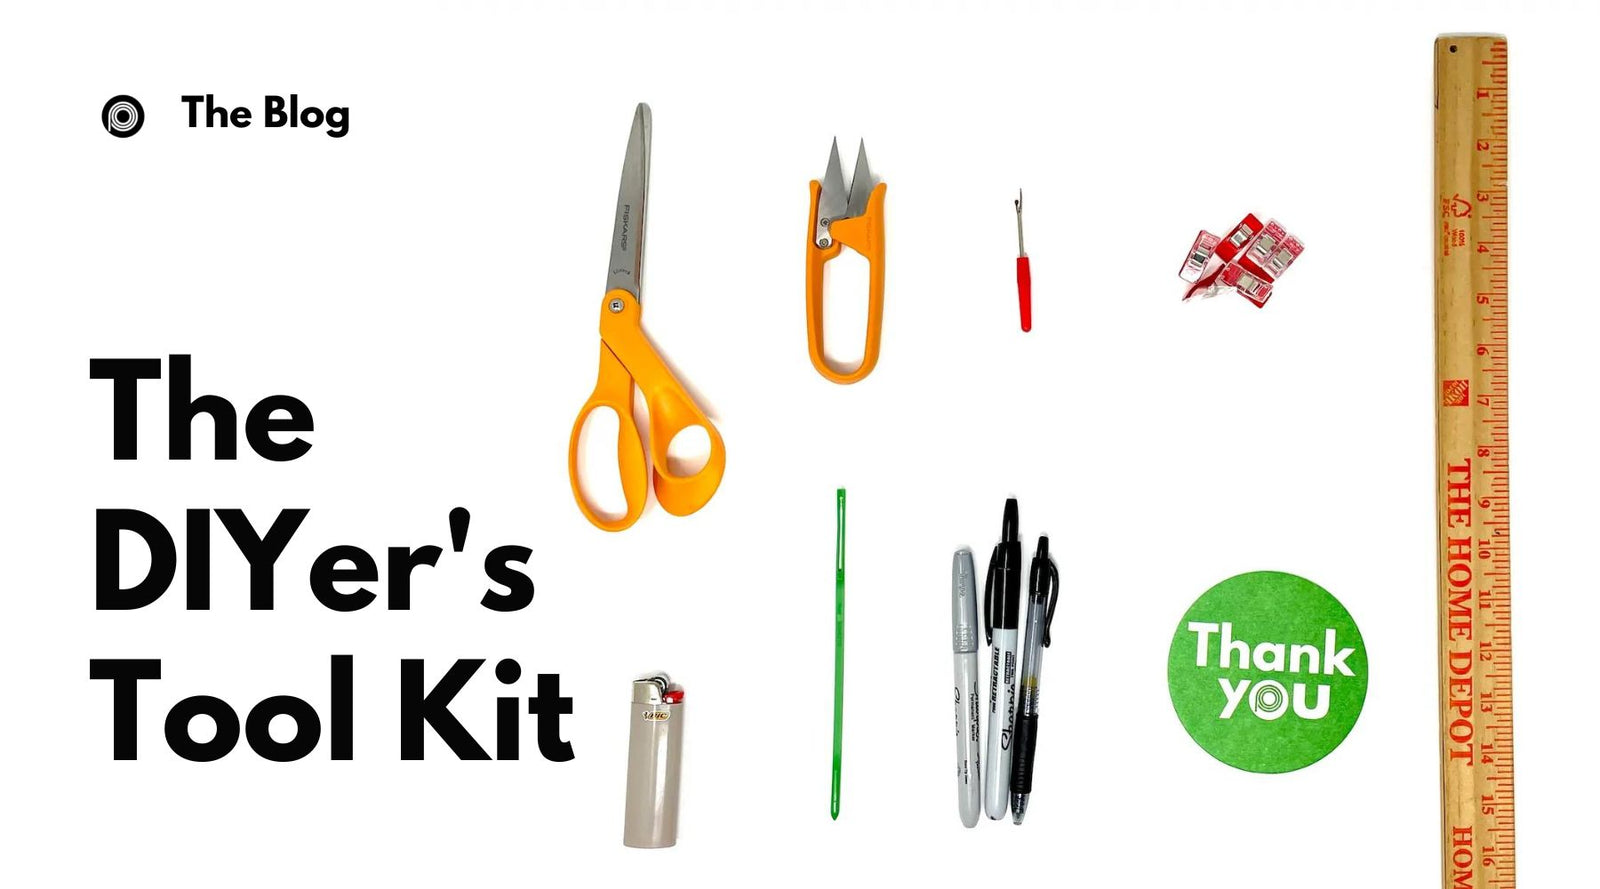

In this blog post we go over the 7 essentials for a standard DIYer’s tool kit. The following tools are just a template for the most popular items. Although these are some of the most used items in their categories, specific preferences vary from maker to maker.
You may have read a similar blog post to this in the past. It looks very similar but we are revamping our list to include some newer products.
1. Cutting Device

We’re going to assume that everyone knows why you need a cutting device.
But something many people overlook is the importance of fabric specific scissors or rotary cutters. Having a blade that is well-sharpened and used just for projects will help you cut finer lines and keep your measurements more precise.
The two most popular options for a cutting device are scissors and rotary cutters. Both tools have strengths and weaknesses and are often used together for a killer duo.
2. Thread Snips

Unlike scissors, thread snips are optimal for working in small spaces - hence the small nose and small blades. The scaled-down element of thread snips mitigates the “oh crap” moments.
For example, if you use scissors to trim threads, you may accidentally cut off a part of your pattern. Speaking for a friend, of course.
In theory, if you use your good scissors for miscellaneous cutting, the blades will dull over time. It's best practice to use them for fabric cutting only.
There are a quite a few thread snips options on the market. We have found these to be some of the most reliable and most durable.
3. Seam Ripper

Although no one likes to admit it, seam ripping is a part of many DIY projects.
Many of us like to take on a challenge and push our abilities. Inevitably, we'll make mistakes, but the seam ripper is the secret "undo" button. Since we're able to seam rip and try again, you actually end up learning a lot more.
If you don’t need this in your kit, then please let us know. You are likely a DIY god and we would love to meet you.
For us mortals, just know that mistakes are totally normal. Seam rippers are cheap, so you might as well snag one and keep learning.
4. Marking Devices

There are three marking tools that we keep in our maker space. 1) Sharpies. 2) Pens. 3) Chalk.
When you’re working with a variety of fabric colors, textures, materials, and prints, it can sometimes be difficult to make markings that are noticeable. We have found that these three tools deliver the range of marking ability needed to measure, cut, and fold accurately.
Some people use silver sharpies, colored pencils, chalk, and other marking tools to accomplish the same job.
It is worth noting that sharpies and pens are not for everyone. Given the permanent nature of the ink, you want to ensure that you're trimming off the marked areas or at least hiding it in a binding.
According to professionals, chalk is the best way to go because wipes or washes off and works really well on just about all materials.
5. Clips

You may not be sold on the idea of clips, but we cannot overstate their value in the DIYer's tool kit.
Clips replace the job of pins in traditional sewing. Many of the technical fabrics that we carry don’t respond well to being pinned. For example, on some fabrics, each hole is permanent and then needs to be sealed afterwards.
By and large, clips have become the standard for makers to eliminate fabric harm while accomplishing the task of keeping fabrics in place.
Connecting back panels, sewing the ridgeline of your tarp, and getting a good felled seam will be much easier with proper clipping. Use clips. You won't regret it.
6. Burning Device

A quick burn is a crucial finishing step for all MYOG projects. Whether that’s running a lighter along the edge of fraying fabrics, melting thread bits down, or whipping the end of a cord, a clean edge is always more professional looking.
Many people use standard lighters for this requirement. They are arguably the easiest, cheapest, and most consistent way to burn ends. Other options include plasma lighters, candles, hot knives, and other burning devices.
Disclaimer: Please be careful with fire around your fabrics. All materials have different melting temperatures and will react differently. Make sure you practice on scrap materials first and never hold the flame too long or too close to the product.
7. Measuring Device
Even the simplest tool comes in many forms. Makers use rulers, yard sticks, measuring tapes, speed squares, measuring mats, and other hacks to make sure their dimensions are just right.
The ruler is the unsung hero of makers everywhere. It’s rarely the coolest or flashiest tool in your kit, but it's VERY important. Can you imagine making a backpack without having exact measurements? Yikes.
An important piece of information to remember is that depending on what you're making, multiple measuring devices may be required for the best result. For example, measuring the circumference of something you'll likely need a flexible measuring tape. For patterning items that are longer, you will need something like a yard stick.
Honorable Mentions:

Cutting Mat
The foundation of every DIYers space is a proper cutting mat. The cutting mat is half table saving technology and half measuring device.
If you use a rotary cutter then a cutting mat is an absolute necessity. Even if you use scissors, a cutting mat will make things easier.

Bodkin
What is a bodkin? If you don’t know, then fear not. I’ll let you in on this little secret right now.
A bodkin is a long, thin, and slightly flexible tool with a clasp on one end that helps you easily feed a cord through a channel and continue pushing that cord all the way through to the other end.
I'll go ahead and say it - bodkins are life changing. In fact, you are scientifically guaranteed to be ~70% less angry when making a cinch-top bag. Guaranteed science.
And there you have it! These are 7+ tools that make our tool kit in the RBTR maker space.
Keep in mind that having a different kit doesn’t make you any less of a DIYer. Every maker is on their own journey, so enjoy where you are and learn as you're able.
Let us know what you use or if you have any hacks!
Leave a comment
Comments will be approved before showing up.