
Your Cart is Empty

Five weeks ago we made two identical X-Pac stuff sacks. The only difference between them was how they were seam sealed.
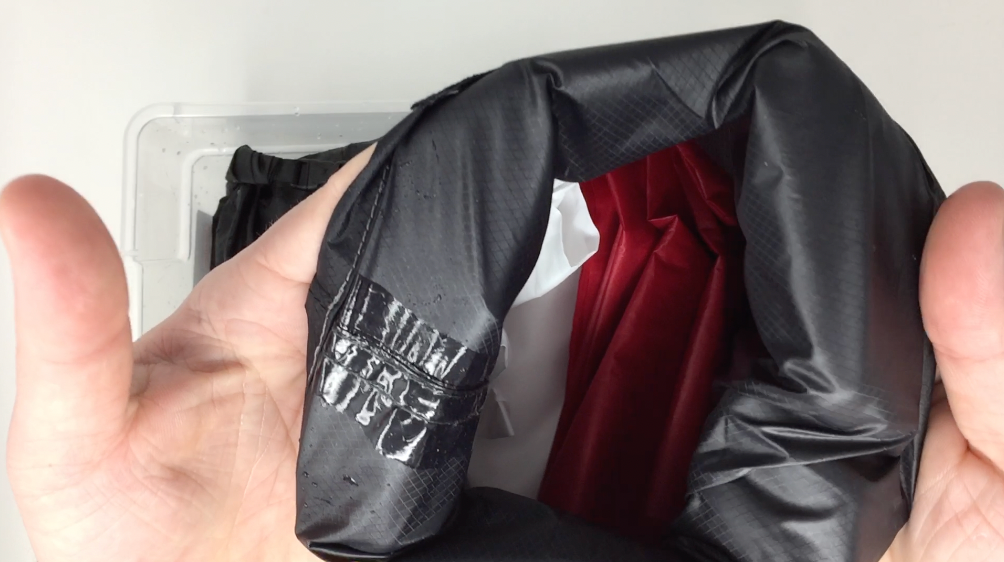
In the end, neither bag kept the contents dry. Due to the results of that test, we saw that many people were curious at how to create a dry bag.
In this blog, we will show you how to create your very own dry bags.
You may be wondering what the difference between a stuff sack and dry bag is. Simply put, a stuff sack is an organizing bag with little to no defense against moisture. A dry bag is a completely air tight bag that will protect items that MUST remain dry.
These are the materials we to make the dry bags:
Fabric:
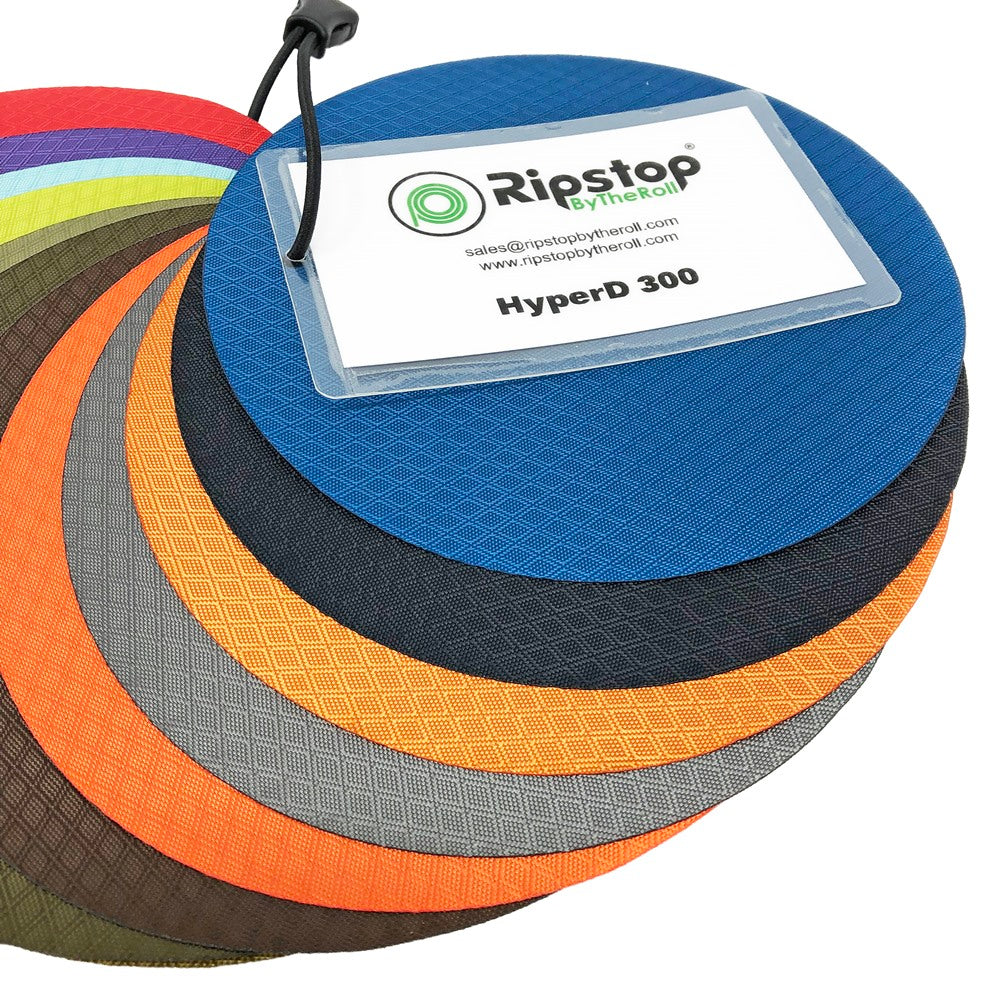
- 1.6 oz HyperD PU400
Components
- Seam Grip
This method should work with most PU coated fabrics. If you want to know about a fabric’s relationship to Seam Grip specifically, reach out to our customer support! If you’re looking at using Dyneema® Composite Fabric or other tapeable materials, this method will work for that as well.
It is said that 3-4 rolls before clipping your drybag will ensure waterproofness. With that in mind, you will need to know what size of a dry bag you will need, then scale up to account for the roll closure.
Quick Tip: Here’s an easy way to discover the capacity of a bag in liters.
(Length x Width x Height) = 1,000,000
Your length, width, and height should be in millimeters for an accurate conversion.
I.e (200mm x 180mm x 160mm = 5,760,000) / 1,000,000 = 5.76 liters
We recommend that you always cut a larger piece to give yourself a little buffer. Other things to remember when you are cutting your blank are the seam allowance, french hem, roll hem, roll top, boxed corners (if applicable), and anything else that may require additional fabric.
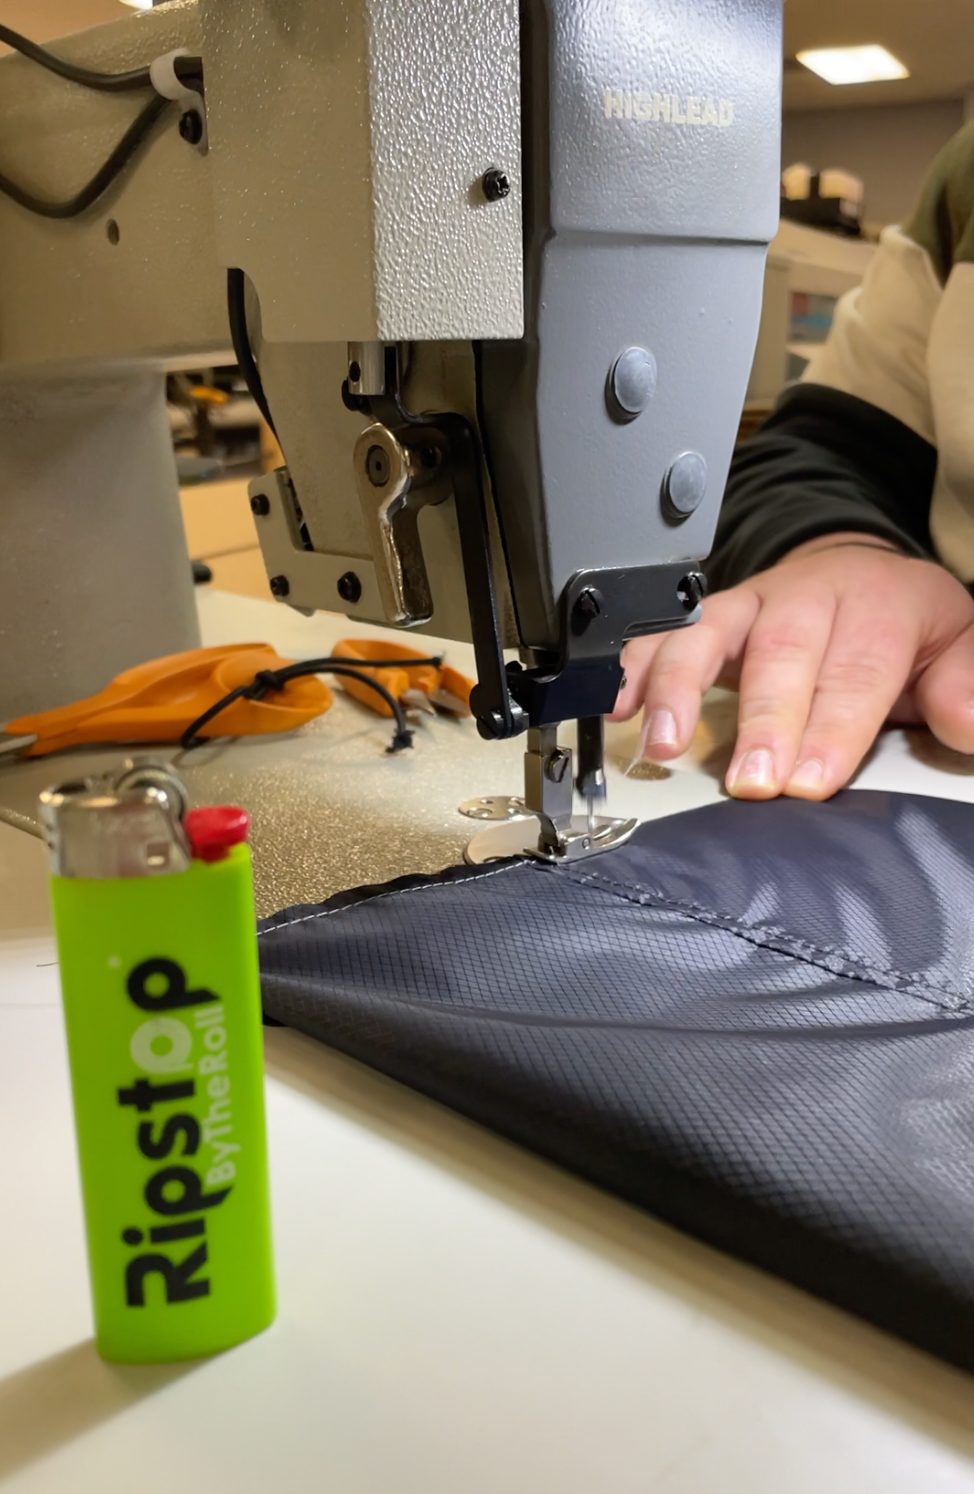
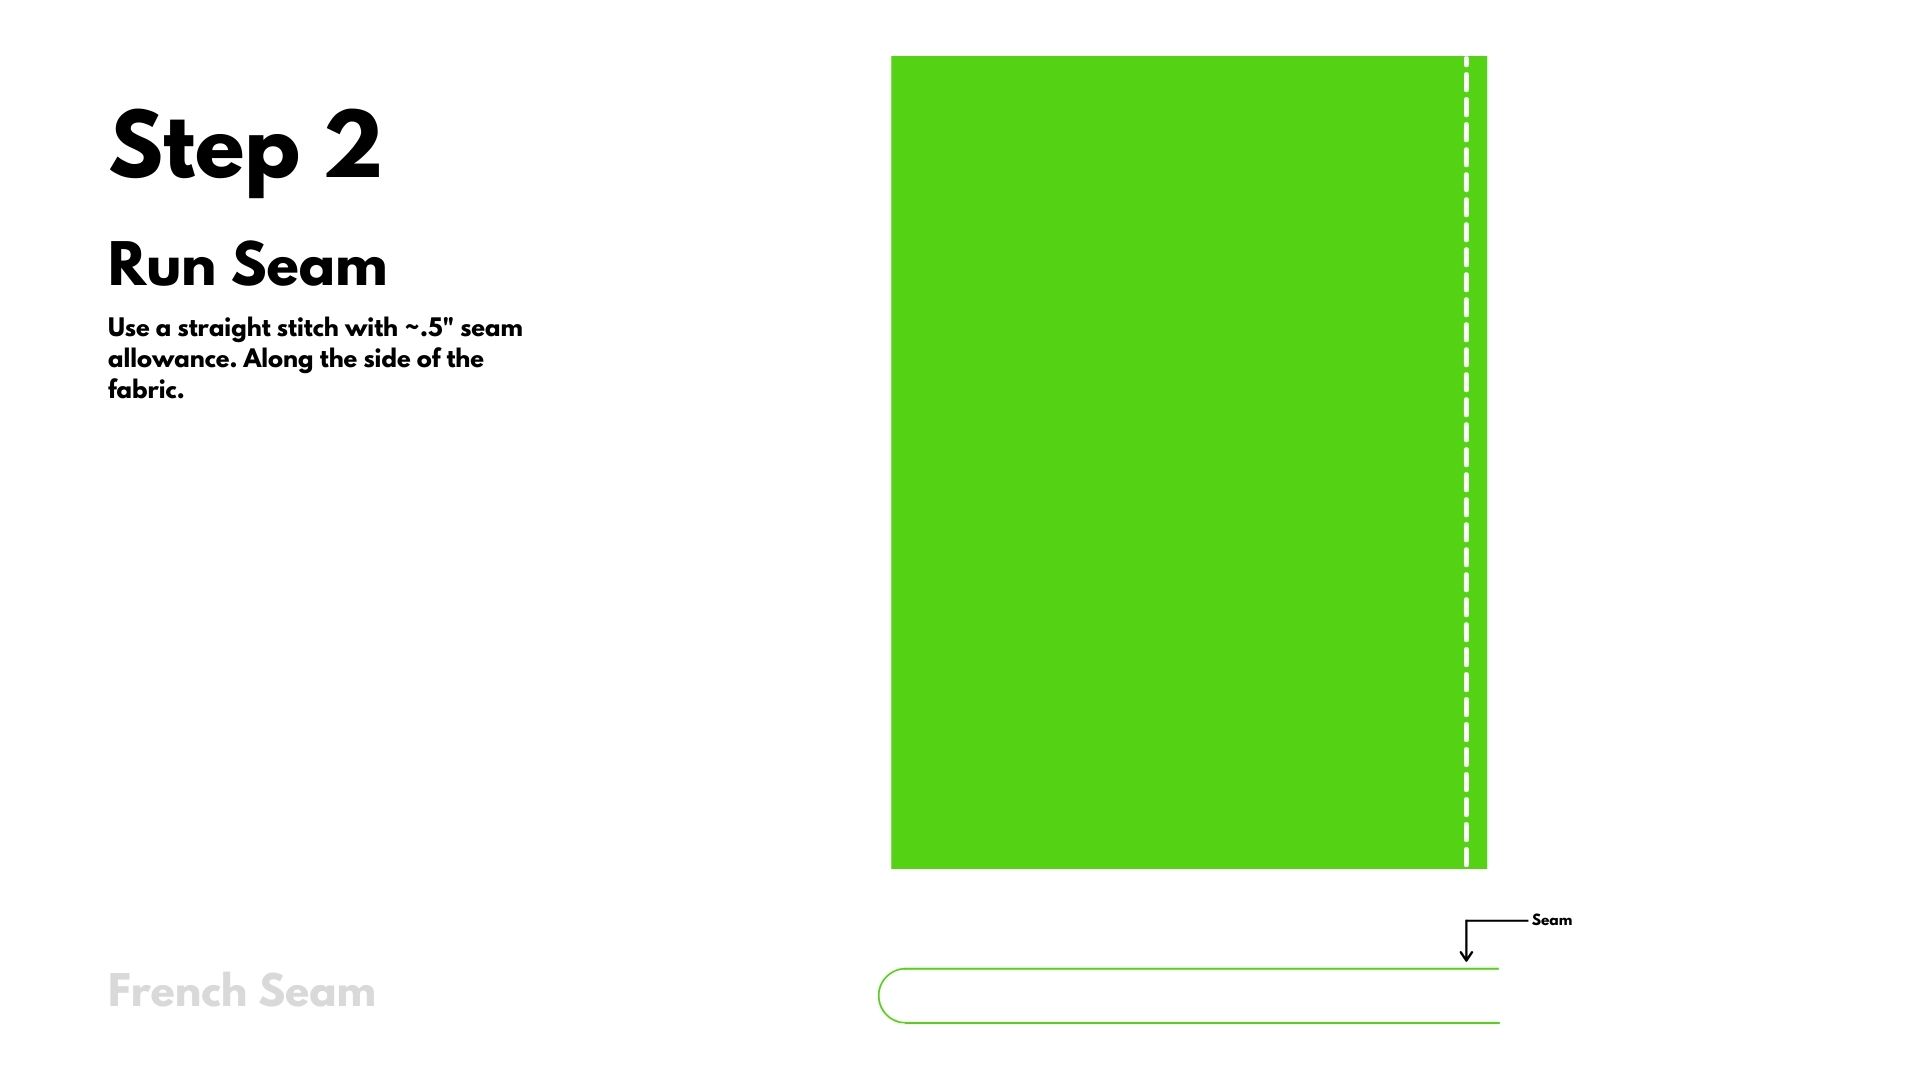
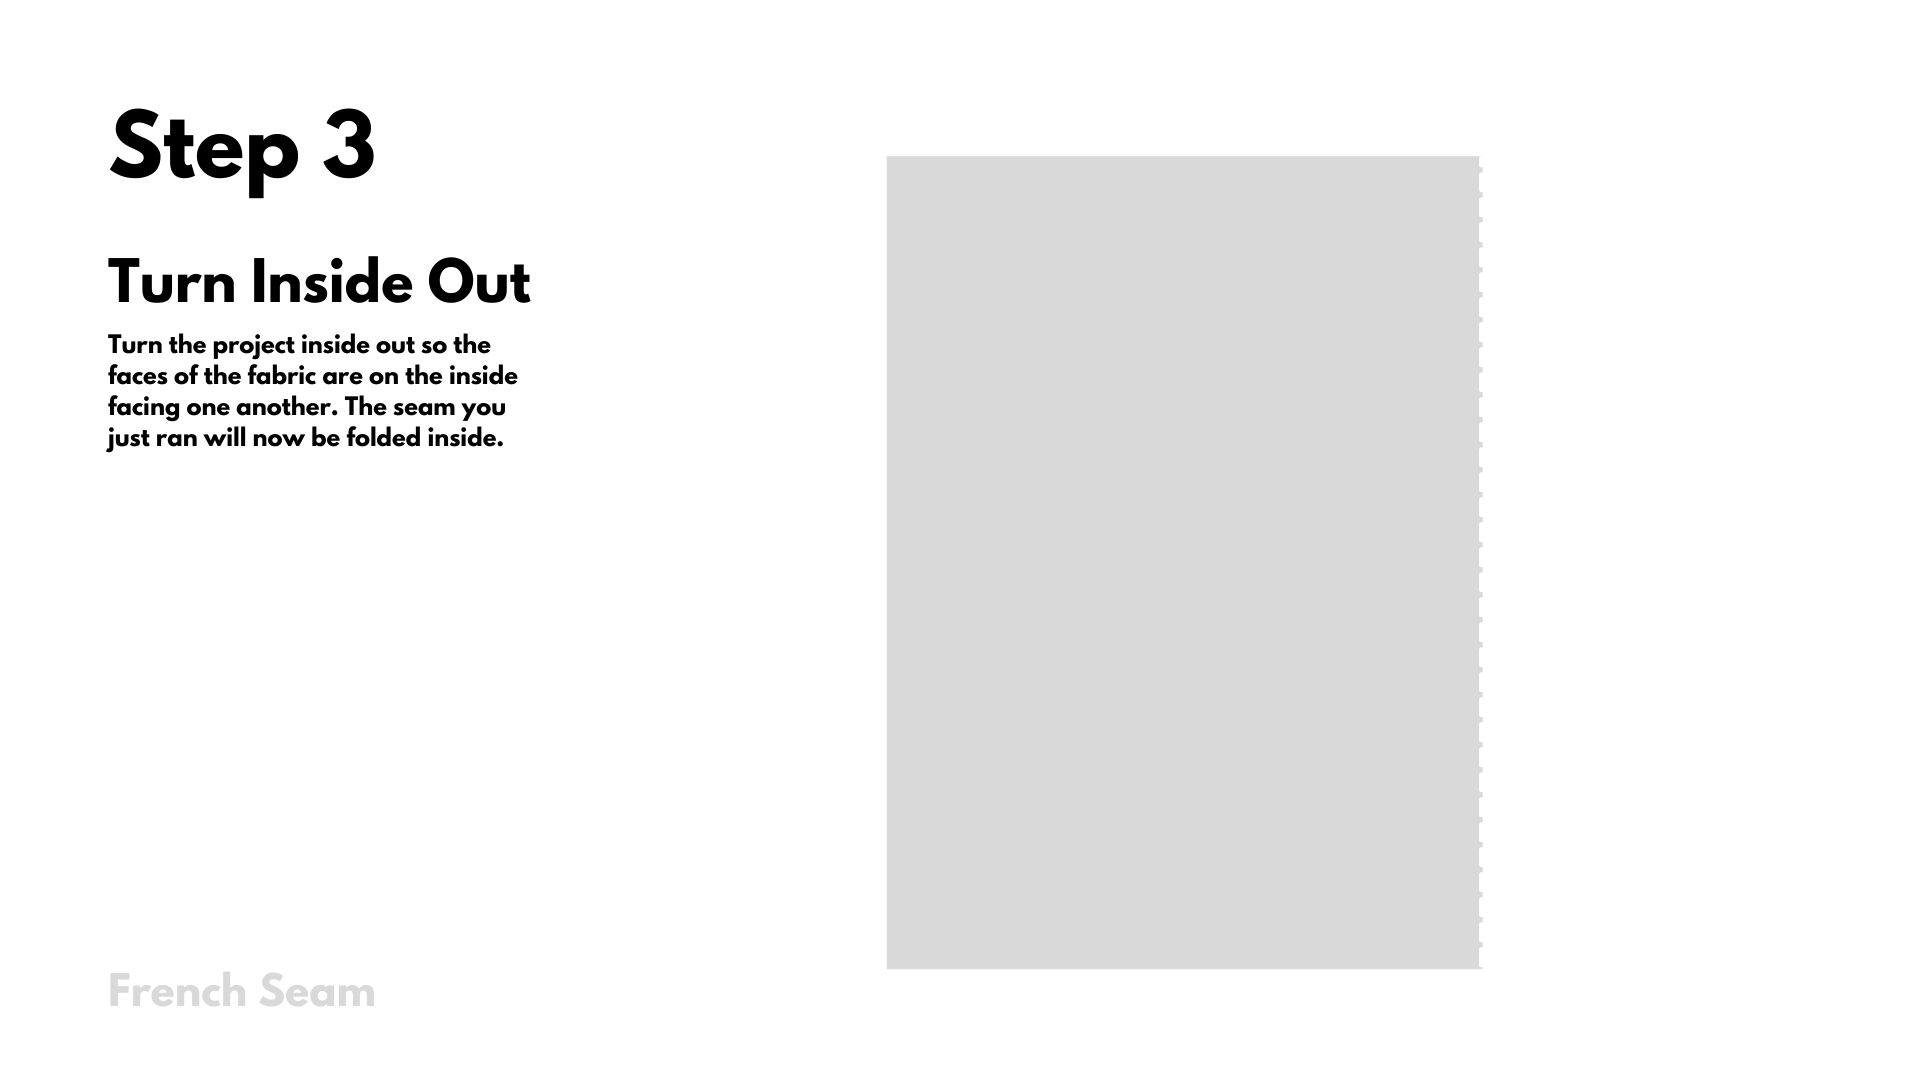
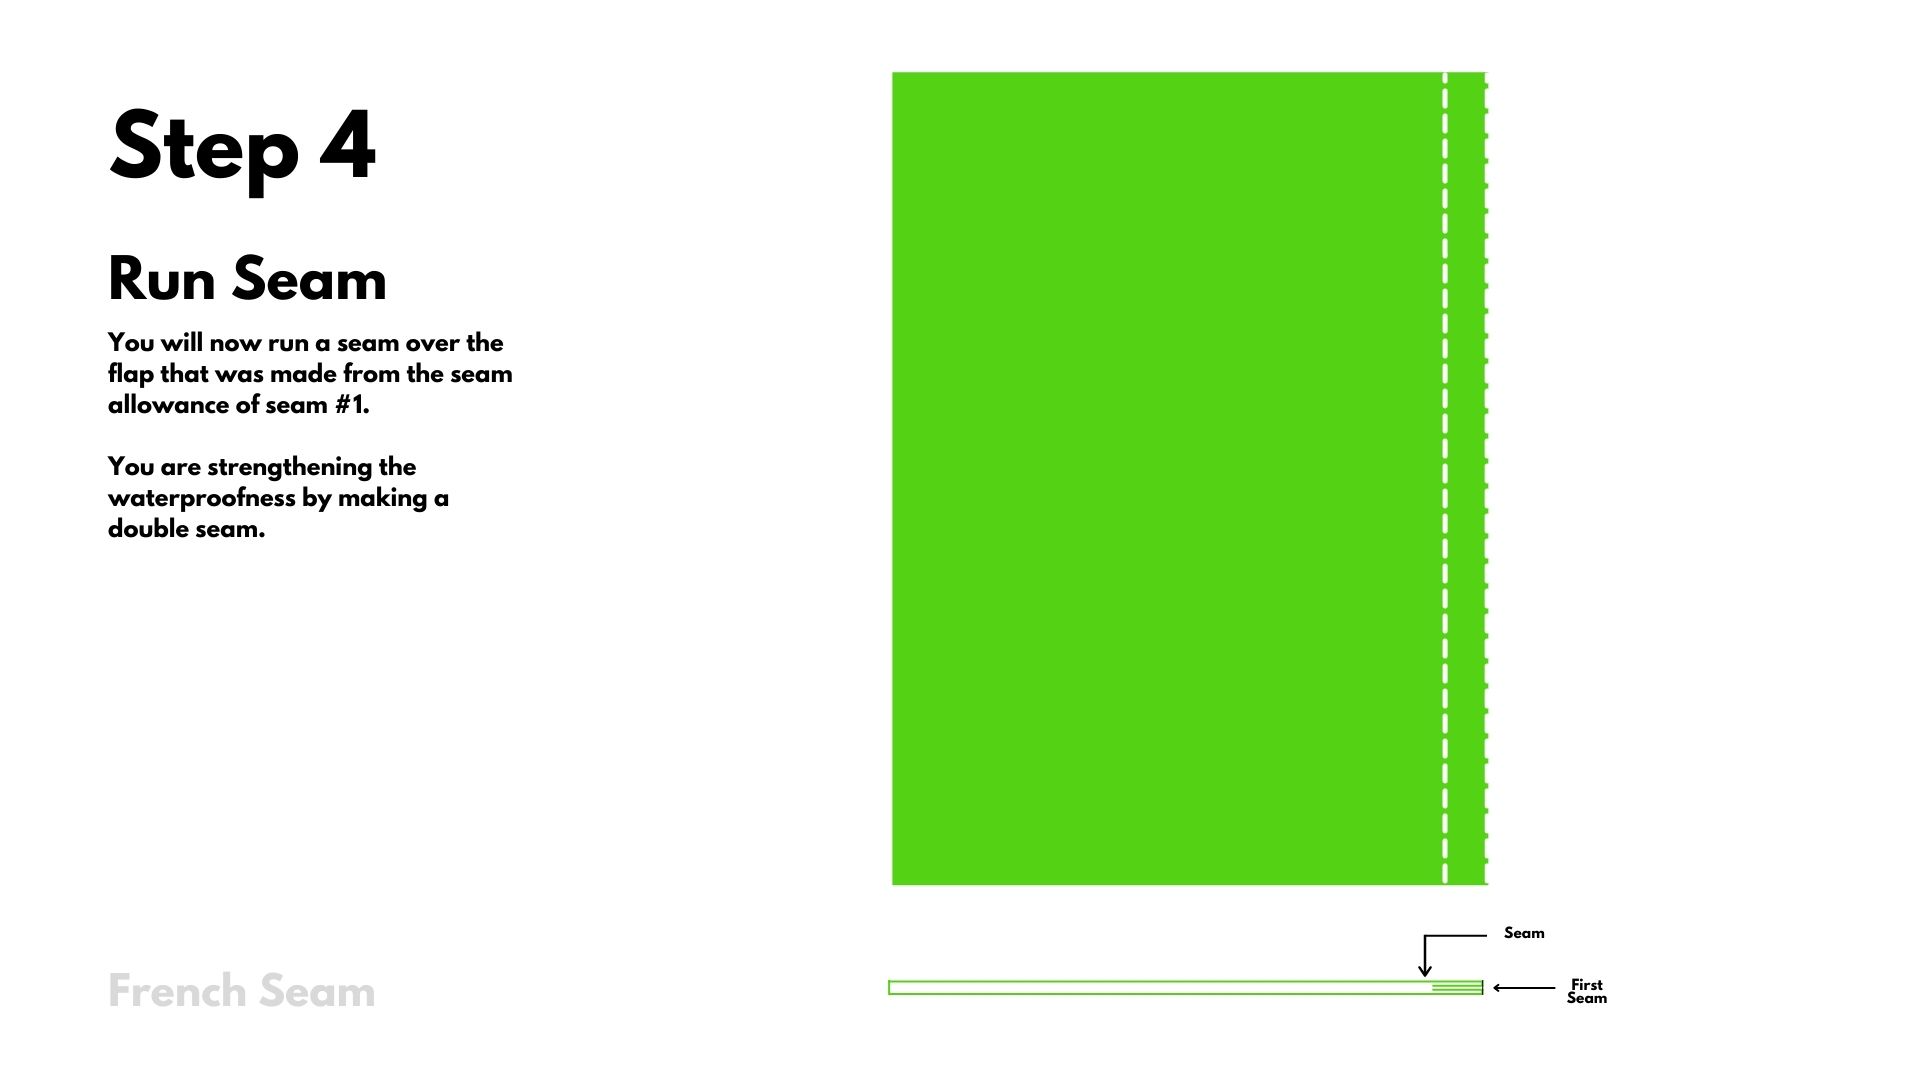
This is where things get really fun! If you’re not already familiar with a hybrid french seam, this is where you’ll learn.
Certain seams will do a better job than others at keeping water out. The hybrid french seam is the one we have chosen based on simplicity.
How to sew a hybrid french seam:
For those of us that are visual learners, check out the image tutorial on how to make a French seam.
We’re onto the final step!
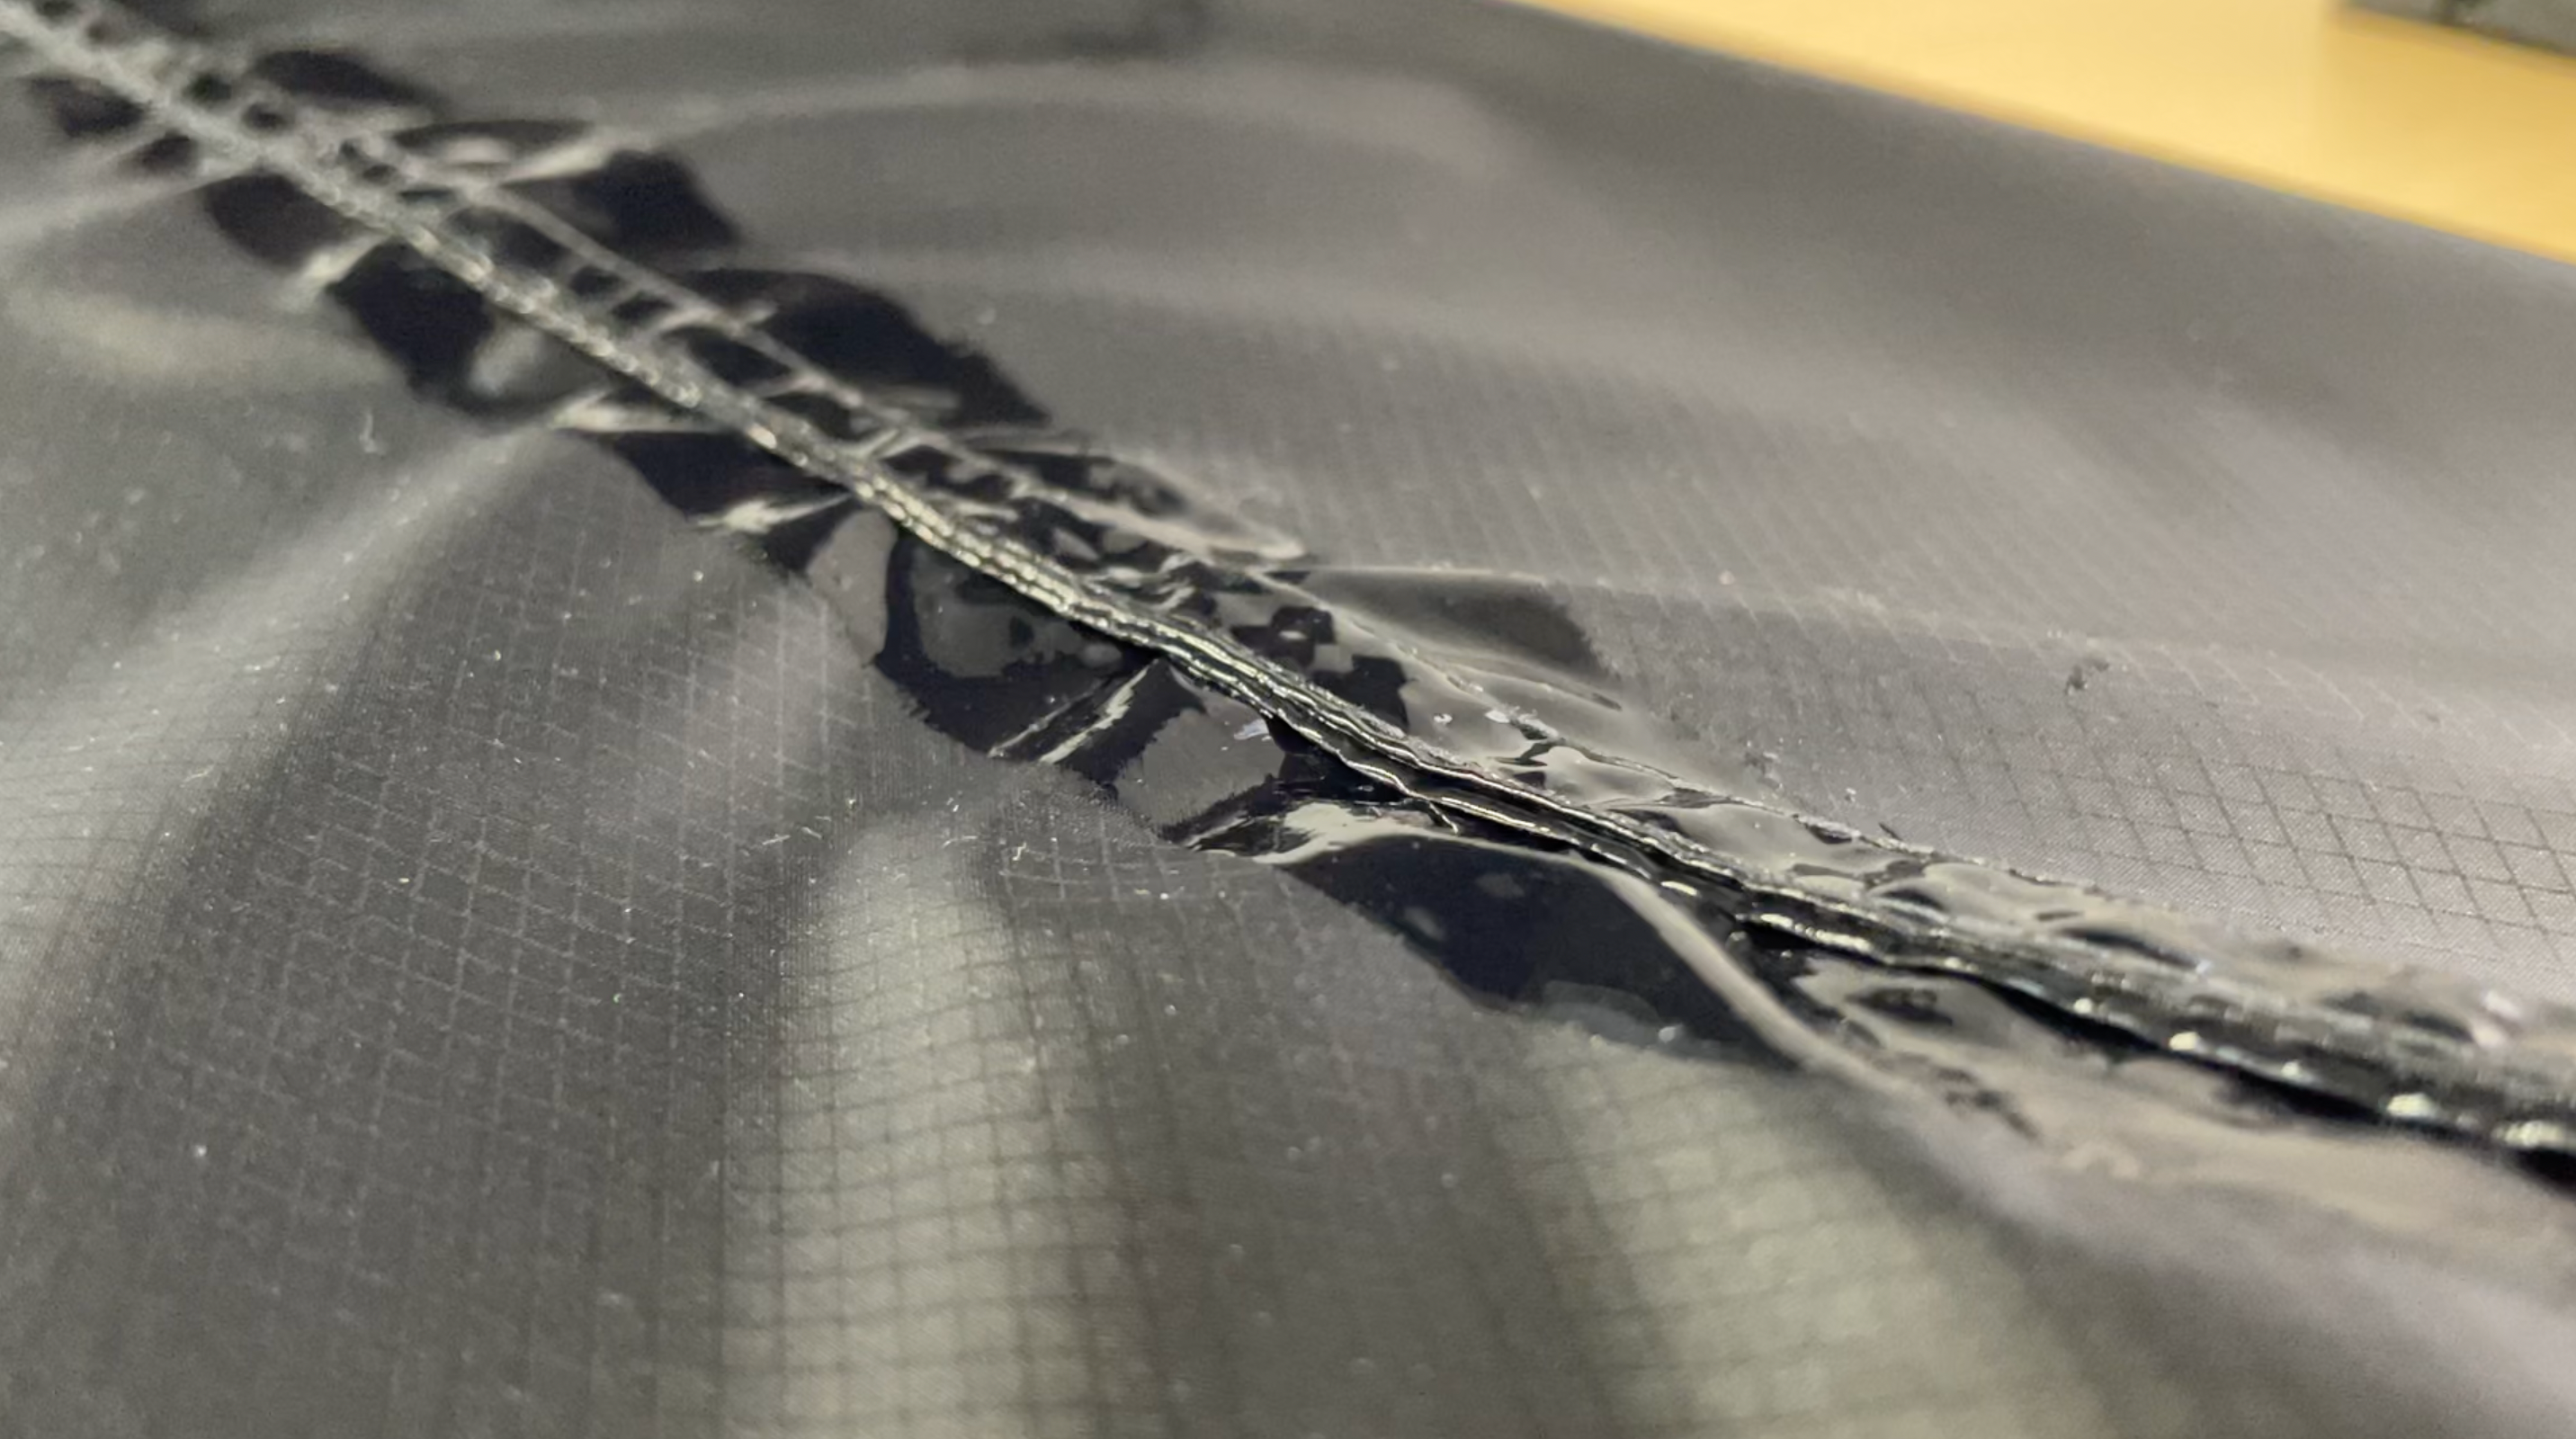
Seam sealing is nothing to be worried about. However, there are a few notes to be aware of leading into sealing your project. You may want to grab a glove or something that keeps your hands clean while also enabling your full dexterity. Think about keeping your fabric taut. It may be obvious, but this stuff is very sticky and any little bit that sticks together will likely stay together!
You will begin by putting some of the seam grip on your finger or on a makeshift palette. Take the seam sealer and start to work it in the seam. If you just think about painting the seam with sealer, you will not get the best results. You really have to work the seam grip into the seam and apply with vigor.
Applying the seam grip takes very little time. The curing period will take up to 12 hours. We recommend respecting that time frame to get the best results from your project.
Elapsed Time: ~ 13 hours Construction Time: ~ 1 hour Curing Time: ~ 12 hours
That’s it! You’ve made a dry bag.
These are fantastic projects to have onboard if you’re kayaking, SUPing, boating, or even if you’re hiking, running, biking, etc. and just simply need your stuff to stay dry.
The benefits of a dry bag are endless but making your own means you can choose the color, the components, the size, and it’s cheaper than buying a set.
Now it’s your turn! Pull out a scrap and see what you can do.
Comments will be approved before showing up.


Judd
March 15, 2021
How do you sew down the flap, Step 5, doesn’t make sense without a specialty machine? Or am I missing something super simple?